Arc
An arc from three points — start, end and bulge — for when you need one smooth curve, not a full contour with nodes. For example, a rounded flap edge or a thumb notch on a card holder.
How to draw
- Click the "Arc" button on the left panel or press
A. - Click the arc's start point.
- Click the end point — for now there's just a straight line between them, like a rubber band.
- Drag the mouse to one side and click a third time — this is the point the arc will pass through, and it sets the bulge.
Esccancels the drawing at any step.
If the third point lands exactly on the line between the start and end, the arc has nothing to bulge from, and the app will warn about it right on the canvas. Click a point off to the side of that imaginary line — the further off, the stronger the bulge.
After the third click the arc is ready immediately, and the app switches to the "Selection" tool on its own — the arc is already selected, so you can view or edit its properties right away without switching manually.
Properties
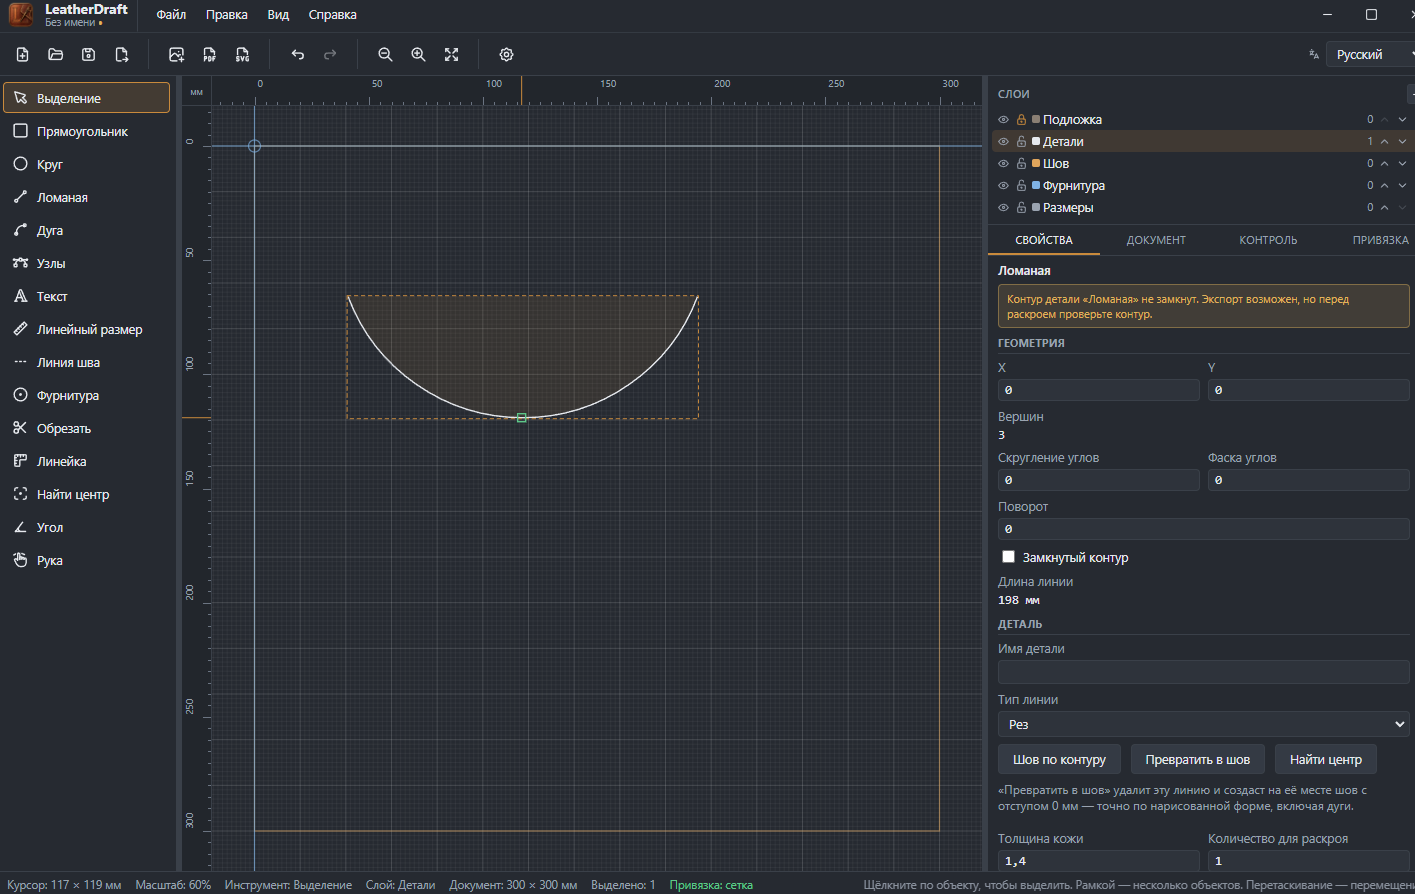
A finished arc is an open polyline with three vertices, so its geometry fields are the same as the Polyline tool: vertices, corner rounding and chamfer, rotation, line length. The difference in the screenshot is the warning at the top of the panel:
- "'Polyline' piece contour is not closed"
- An arc is an open line by construction, not a piece with an interior area. Export still works, but it's worth checking the contour before cutting — maybe the arc was meant as part of a closed piece and needs joining to the rest of the lines.
- "Convert to stitch"
- On an open line, this button works differently than "Stitch along contour" on closed pieces: it doesn't build a stitch line next to it, it replaces the line itself with a stitch at a 0 mm margin — following the drawn shape exactly, arc bulge included.
To keep drawing the rest of the piece's contour after an arc, or to tweak the bulge itself — that's the Nodes tool: an arc, like any polyline, can be edited point by point once it's drawn.