Stitch Line
The app works out the hand-stitch holes for you: set the edge margin and spacing, and the hole count, actual spacing, and any leftover "fudge" gap along the length show up right in the report. No need to step it off with a compass on paper to see whether the spacing comes out even around the whole perimeter.
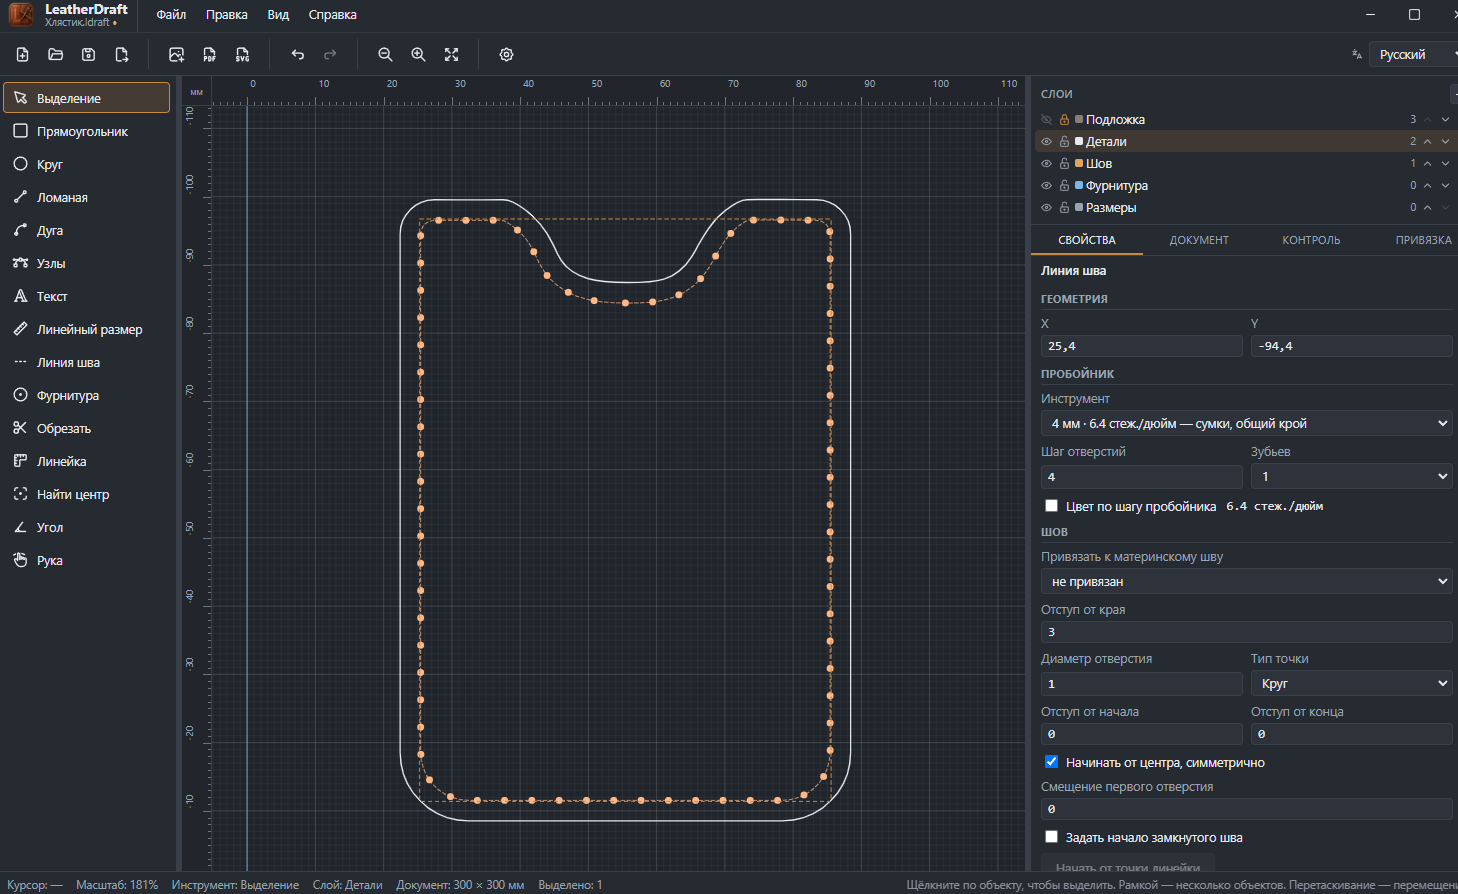
How to lay out a stitch
- Click the "Stitch Line" button on the left panel or press
S, then click the start and end of the line on the canvas. - Faster for a whole piece: select it with the "Selection" tool and click "Stitch along contour" in the properties panel — the stitch follows the contour exactly, at a margin from the edge, with no manual tracing. That's how the stitch in the screenshot above was made.
Punch and spacing
- Tool (punch)
- A preset for punch width and its spacing in "stitches per inch" — from fine work to a heavy saddle-stitch punch on thick leather.
- Hole spacing
- Distance between holes in millimeters — can be overridden by hand without leaving the chosen punch preset.
- Prongs
- Number of prongs on the punch — how many holes go in with one strike. The app will warn if the prongs won't all physically land at once on a curve — those holes get punched one prong at a time instead.
- "Color by punch spacing"
- Colors the line according to the chosen spacing — purely a visual cue on the canvas, doesn't affect the calculation.
Margin and hole layout
- Edge margin
- Distance from the piece's edge to the stitch line.
- Hole diameter, Point type
- Size and shape of each hole — round or diamond, whichever a saddle stitch uses.
- Start offset, End offset
- Open stitches only — how many millimeters the first and last hole fall short of the line's actual ends.
- "Start from center, symmetric"
- Lays out holes not from the first point to the last, but from the middle of the line outward in both directions — so if an uneven "fudge" step is unavoidable, it ends up split evenly between both ends instead of dumped on one side.
- First-hole offset
- Shifts the whole layout along the line by a set distance, without changing the spacing itself.
- "Set closed-stitch start"
- For a closed contour, lets you explicitly choose which point along the perimeter the first hole is counted from — either by number (distance along the contour from its zero point), or with the "Start from ruler point" button: place the Ruler where you want and click the button.
- "Set hole count"
- Manually enter the number of holes instead of calculating from spacing — the spacing is then recalculated from that number, not the other way around.
- Link to parent stitch
- Synchronizes the hole layout with another stitch — for example, so the holes of two pieces that get sewn together line up exactly.
- Color, Linked stitch
- The line's color on the canvas, and a technical note if this stitch is linked to another (see "Link to parent stitch" above).
A single hole can be removed from a finished layout without touching the stitch's
overall settings: click it with the "Selection" tool and press Delete —
useful, say, where a rivet will sit instead of a stitch. Linking to a parent stitch
and auto-fitting the margin are big topics on their own, to be covered in a separate
article later. For laying a stitch exactly along your own, manually adjusted line —
via Offset with a 0 edge margin — see the end of that
article.