Rectangle
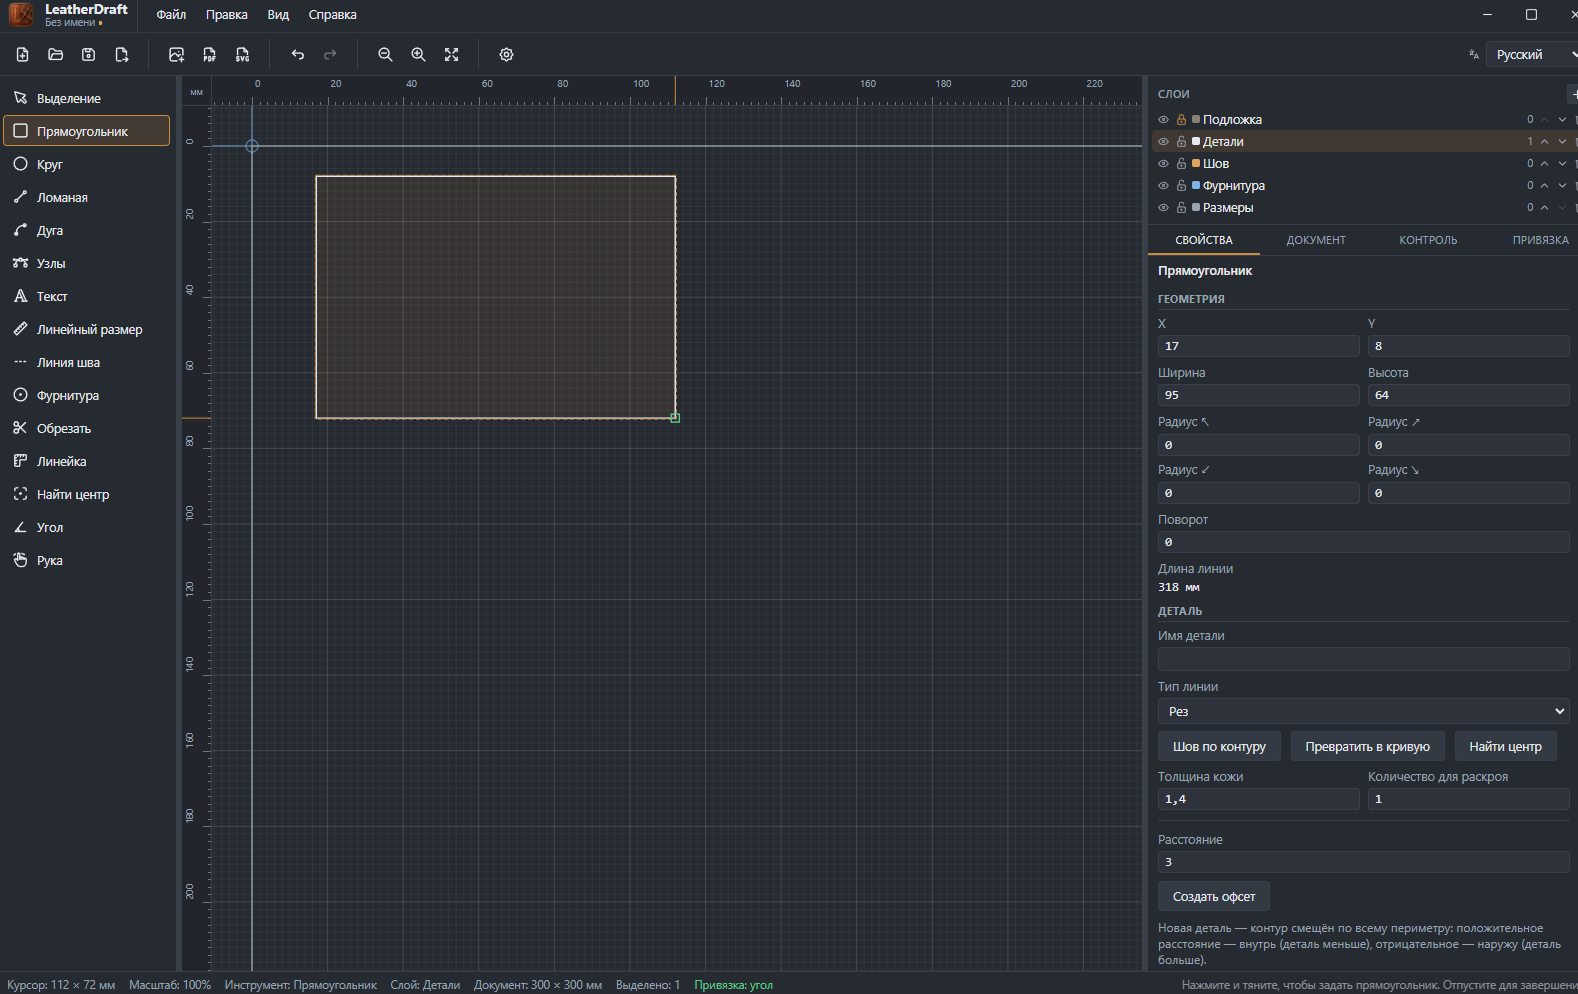
The fastest way to start a simple-shaped piece — a backing, a rectangular pocket, a book-style flap. You can round the corners, rotate it, or turn it into a curve and refine it with the "Nodes" tool afterwards — a rectangle isn't a dead end, it's a quick start.
How to draw
- Click the "Rectangle" button on the left panel or press
R. - Click one corner point and, without releasing the mouse button, drag to the opposite one.
- Release the mouse button — the rectangle is built and immediately selected; fine-tune exact sizes in the properties panel on the right.
The cursor snaps to the grid and to key points of already-drawn pieces — if a neighboring piece is nearby, the corner will latch precisely onto its edge or node.
Geometry
Fields that exist only for a rectangle:
- X, Y
- Position of the top-left corner on the canvas, in millimeters.
- Width, Height
- The piece's dimensions. You can also change them by dragging the corner handles on the canvas.
- Radius ↖ ↗ ↙ ↘
- Rounding for each of the four corners separately — they don't have to match, e.g. a bag flap often has sharp bottom corners and rounded top ones.
- Rotation
- Angle in degrees, if the rectangle shouldn't sit strictly on the canvas axes.
- Line length
- Perimeter — calculated automatically, useful for estimating edge-binding or thread usage.
Common piece properties
Below the geometry is the "Piece" block, identical for the rectangle, circle and polyline, because all three tools create the same kind of entity — a pattern piece:
- Line type
- Cut, stitch, fold, glue or guide line — affects how the line is exported and what the legend shows.
- "Stitch along contour"
- Builds a stitch line that exactly follows the piece's contour with an edge margin — no need to trace it manually with the "Stitch Line" tool.
- "Convert to curve"
- Turns the rectangle into an editable polyline — for example, to round just one corner freely with the "Nodes" tool instead of by formula.
- Leather thickness, Cut quantity
- Production parameters for the piece — they don't affect geometry, but go into the spec sheet on export.
- Distance + "Create offset"
- Builds a copy of the contour offset around the whole perimeter — inward (a slightly smaller lining) or outward (a larger seam allowance). Positive number — inward, negative — outward. See the Offset article for details.
A finished piece can be stitched right away — see the Stitch Line article — or fitted with snaps and eyelets using the Hardware tool.