Punch
One specific hole marker — no stitch layout, no margin, no spacing. Just click a spot and a point lands exactly there — right in the middle of an existing row of stitch holes, or well away from any line at all.
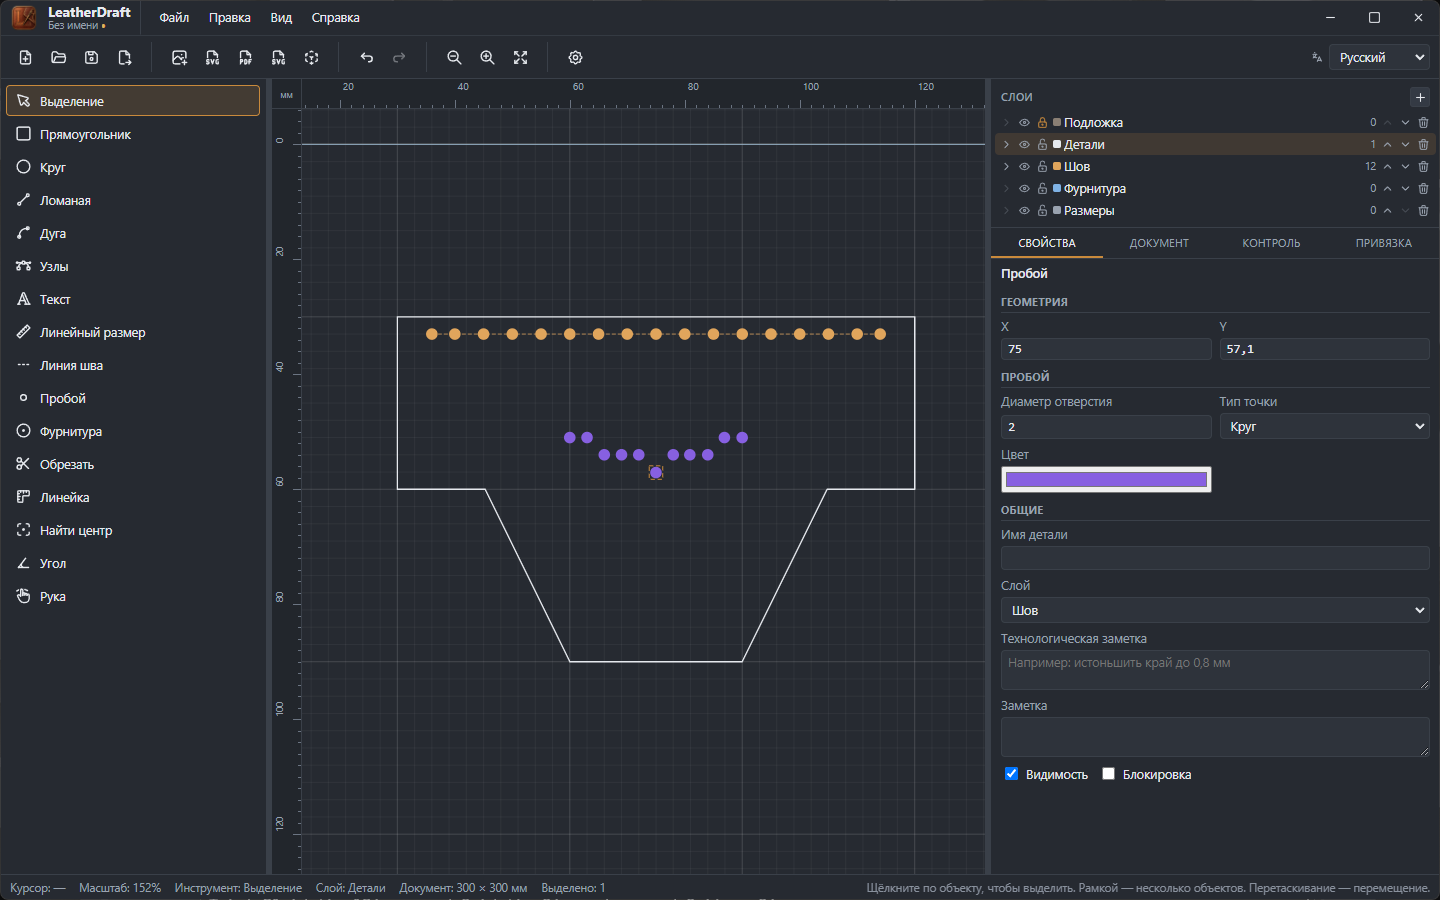
How to place one
- Click the "Punch" button on the left panel or press
P. - Click a spot on the canvas — a point lands exactly where you clicked, with no snapping to neighboring holes. Like "Hardware", the tool stays active after each click — handy for placing several punches in a row without going back to the toolbar each time.
Punch properties
- Hole diameter
- Size of this specific point.
- Point type
- Round or diamond — the same shapes used for stitch holes.
- Diamond rotation
- Angle in degrees, only for the "Diamond" shape.
- Color
- Color of the mark on the canvas.
Diameter, point type and color are remembered between placements — set them up on one punch, and every next one goes in with the same settings, no need to redo them for each point. Diamond rotation isn't remembered: it's the orientation of a specific point at a specific spot, not a general punch style.
Why it isn't part of a stitch
A punch is a standalone object, completely independent from the Stitch Line: it's never counted in any stitch's layout, thread-length estimate, or punch-strike count, even if it sits visually right on that stitch's line or on top of one of its holes. That's exactly what the tool is for — marking a single hole somewhere a regular, evenly spaced stitch layout has no business being: a decorative pattern of individual points (an arc, a wave — like in the screenshot above), an attachment point between two ordinary stitches, or a repair replacement for one punctured hole without recalculating the whole run.