Hardware
Snaps, eyelets, Chicago screws and rivets — not pictures for decoration, but pieces with a real hole diameter that go into the same spec sheet as the cut pieces and the stitching.
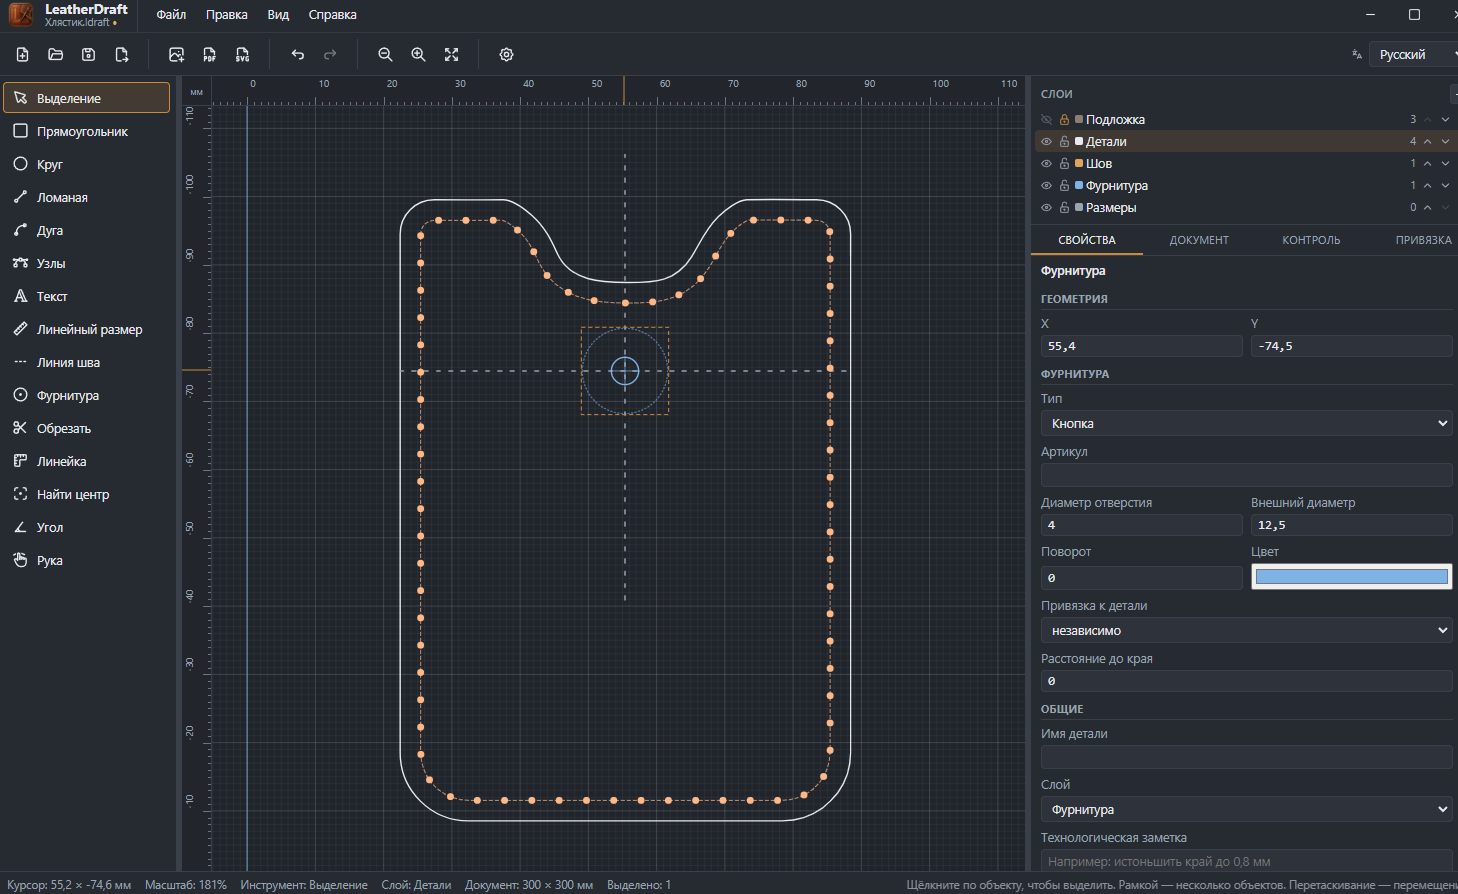
How to place it
- Click the "Hardware" button on the left panel or press
H— a list of types opens below the main toolbar. - Pick a type from that list.
- Click the spot on the piece — the hardware lands at exactly that point, and coordinates can be fine-tuned in the properties afterward.
Hardware types
The type list opens below the toolbar while the "Hardware" tool is active — here's what's in it:
- Snap
- A standard snap fastener — hole diameter and cap outer diameter.
- Magnetic snap
- A hidden magnetic closure, the same diameter logic.
- Eyelet
- A metal ring set into a hole — for a lace, a strap, or ventilation.
- Chicago screw
- A two-piece post screw — commonly used to attach straps and swappable pieces.
- Rivet
- A double-cap rivet for a permanent bond between layers of leather.
- Card slot
- Not a round hole but a rectangular slot — its properties show width and height instead of a diameter.
- Round hole
- Just a hole with no hardware — for a cable, say, or as a placeholder for a snap type not yet decided.
Properties of placed hardware
- Type
- Can be changed after placement too — no need to delete and place it again.
- Part number
- A free-text field for your own marking — which exact snap from stock goes in this spot.
- Hole diameter, Outer diameter
- Size of the punched hole and the visible diameter of the hardware itself (for a card slot, these two fields are replaced by "Slot width" and "Slot height").
- Rotation
- Angle in degrees — relevant for a card slot and other non-round shapes.
- Color
- Color of the mark on the canvas, not the hardware's actual finish.
- Attached to piece
- "Independent" — the hardware is free and doesn't track any piece beneath it. Or attached to a specific piece: then editing that piece's contour carries the mounting point along with the edge it's attached to.
- Distance to edge
- Available when attached to a piece — a controlled margin from the edge instead of an arbitrary point placed by eye.
It's convenient to place hardware once the piece is already drawn and stitched — see the Rectangle and Stitch Line articles — that way you can see exactly where it will physically sit relative to the stitch and the edge. In the screenshot above, the snap sits exactly at the center of the piece — no eyeballing involved: the Find Center tool first placed a crosshair from two opposite contour points, and the snap latched onto their intersection through cursor snapping.